A primal scream erupts from deep inside your body the first time you successfully coax fire from two pieces of dead wood.
Welcome to the Primal (first) Fire Club!
Experienced first fire practitioners make it look easy. It’s like they have secret pyro powers.
Not really. The secret to success with friction fire depends upon detailed attention to three things:
- Materials for the bow drill set
- Crafting details on the bow drill set
- Technique and practice
There are no magic formulas for friction fire. The key is to find wood in your area that swallowed fire and practice the fundamentals persistently. I’ll offer suggestions on wood characteristics that work in our Georgia woodlands.
Gathering Materials
Not every tree will give up fire. Of course, as soon as I make that statement, some determined soul will demonstrate a bow drill fire with Osage Orange. For those new to friction fire, look for fast growing trees with dead but not rotten limbs. If your thumb nail leaves a slight depression in the wood, you’ve found a good candidate.
However, the easiest “cheat” is to stop by a lumber store and buy a kiln dried 1 x 4 cedar board. Also pick up a 5/8 inch poplar dowel rod while you’re there… or carve a spindle from the cedar board. Take them home, craft your set, and practice on your back porch or yard.
Soft wood is more porous and is often found in lowland areas near water. Seems like a contradiction that water-loving trees have swallowed fire. Porous soft wood actually acts as an insulator to retain heat to help the charred dust reach ignition temperature during the friction process. Ignition temperature is 800ºF, give or take, depending on the fineness of the dust particles.
Here are a dozen trees and plants you can coax fire from:
- Tulip Poplar
- Cottonwood (roots work as well)
- Cedar
- Sassafras
- Basswood
- Pine – you may have been told that resins in pine prevent friction and cause a polish to form instead of dust. I’ve made friction fire with pine wood. It can be done. White pine may be the best pine wood for friction fire.
- Sycamore
- Yucca
- Mullein
- Mimosa
- Buckeye
- Willow (roots too)
In my woodlands, my favorite bow drill wood comes from the Tulip Poplar. This species drops lower limbs as it reaches for the top of the forest canopy. Fallen limbs often are hanging off the ground dry on undergrowth. You can also toss a line over dead, bark-less limbs and yank them down. If at all possible, I avoid limbs in contact with our humid Georgia ground.
Crafting Your Bow Drill Set
To begin, here’s the terminology I use for my bow drill set…
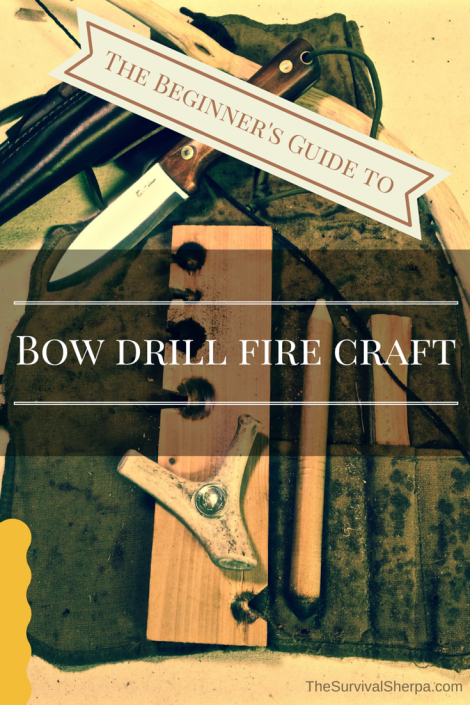
- Hearth Board – a slab of wood placed on the ground which is notched to receive the friction from the spindle. This junction is where the magic happens. (AKA – “fire board”)
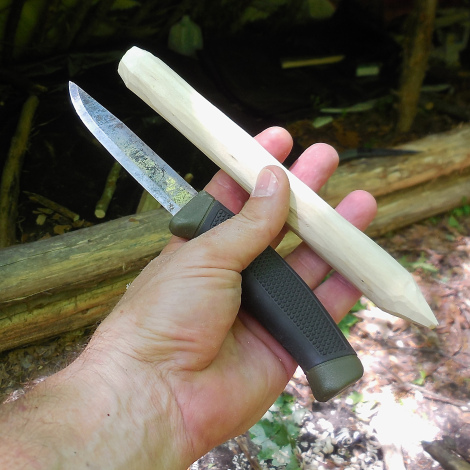
- Spindle – a straight, cylindrical piece of wood of even thickness, carved or naturally straight, fashioned into a pencil-shape with an eraser end and a pointy end. (AKA – “drill”)
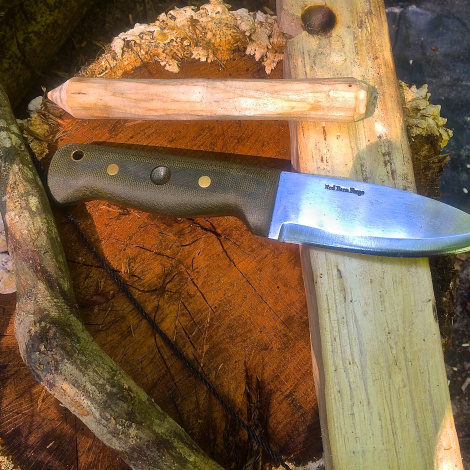
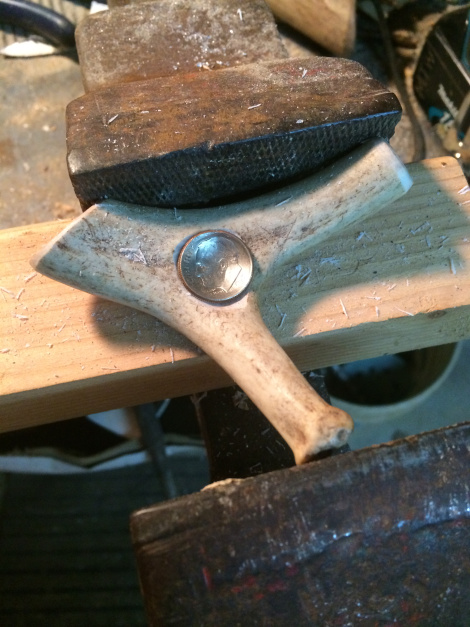
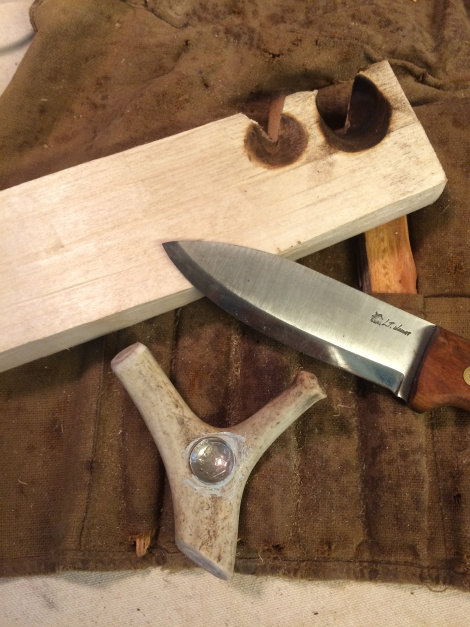
- Bearing Block – a piece of bone, antler, rock, fat lighter’d (self-lubricating), hard wood, glass bottle bottom, knife handle divot, or any number of item used to hold the pointy end of the spindle in place while bowing. (AKA – “socket”, “hand hold”)
- Bow – a slightly curved, inflexible dead branch (hardwood) which reaches from arm pit to fingers.
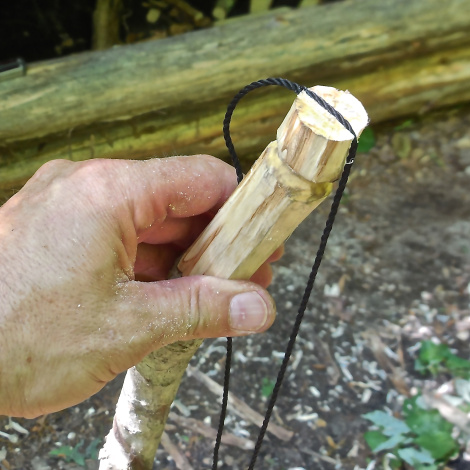
- Bow String – non-stretchy cordage which secures at both ends of the bow with enough slack to receive the spindle. I’ve found real tarred bank line (not the Wally World stuff) grips the drill very well.
- Welcome Mat – a small piece of bark, leather, thin shaving of wood, or any other material available which is placed under the hearth board notch to catch/welcome the charred dust and protect the baby ember.
I’ll be explaining the process of building the set in the order listed above. However, you’ll need to make the spindle before you can finish the hearth board. So skip around the sections as needed.
Let’s build a bow drill set…
Hearth Board
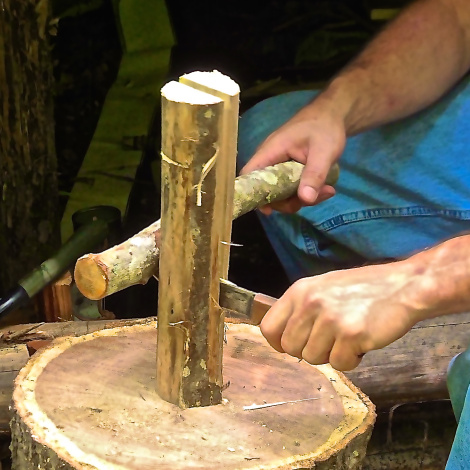
With a round piece of wood, split it down with a cutting tool so that it measures about two fingers across, index finger to thumb deep, and long enough to place your foot to hold the board securely on the ground.
Now you’re ready to carve a pilot hole on one end of the board. Since I’m right-handed, my instructions can be flipped for any lefties reading this.
Place the eraser end of the spindle near the right end of the hearth board with about 1/4 inch of the hearth board showing to the outside edge of the spindle. Use the tip of your knife to start a pilot hole where the center of the spindle was placed on the board. In a drilling motion with the point of your knife, cut in a dimple that will accept the eraser end. The dimple should be about the same size as the spindle diameter and about an 1/8 inch deep.
Down-N-Dirty Tip: To help seat the spindle in the divot, leave a small 1/8 inch point in the center of the eraser end. This way you’ll only have to drill a matching 1/8 inch hole in the hearth board with the tip of your knife. I picked this tip up from Joe Mobley, a friend and friction fire savant. His channel is linked below under Additional Resources.
Spindle
I like my spindle to be 10 to 12 inches in length. I’ve found this length saves my posture and back when bowing.
The spindle diameter can range from index finger size to thumb size.
Carve one end to a pencil point. This pointy end has less surface area resulting in less friction in the bearing block socket.
Carve the friction end into the shape of an eraser. I chamfer/bevel the edges of the eraser edges. This will be the business end where the friction heats the board and creates an ember. Try to use wood from the same tree for both the board and spindle. Rubbing wood together from the same tree gives good traction and grinds dust evenly from the spindle and hearth board.
Both the spindle and hearth board can be made from one limb. Carving the spindle this way will require more whittle work though. If available, use a straight stick to save time and energy.
Bearing Block
My favorite hand hold is on my Red Barn Forge knife. It offers a ready-made socket for the spindle to sit while bowing. However, I don’t always carry that particular knife in the woods.
Many bearing block options are available to you in the woods. A split piece of hardwood can serve as a bearing block by cutting a dimple into the flat side. The dimple needs to be large enough so that the pointy end of the spindle will not wallow out and hit the sides of the dimple causing friction. You want little to no friction on this end of the spindle. Lubricate the bearing block dimple with crushed, green plant material, ear wax, facial oil, chapstick, or Fixin’ Wax if you have some.
I’ve used my char tin lid, broken beer bottle, rock, and my canteen cup as a socket. Pad the top of thin metal with a bandana to prevent heat transfer to your hand.
Bow
Find a dead but strong curved limb about the length of your outstretched arm. Carve a notch in both ends of the bow where your cordage will be attached.
Attach a length of cordage to the top of the bow in the freshly carved notch. Run the other end to the bottom and secure in the other notch. Feed the pointy end of your spindle between the cordage and bow and twist the drill into the rope. If the spindle flies out of the cord, try using both hands. Brace one end of the bow on the ground and the butt end against your waist/pelvis. This will allow you to use both hands to load the spindle into the bow.
The spindle should snap snuggly into the cordage with the spindle to the outside of the cordage with the pointy end facing up when the bow is horizontal.
Burn In the Hearth Board
Again, these are instructions for right-handers.
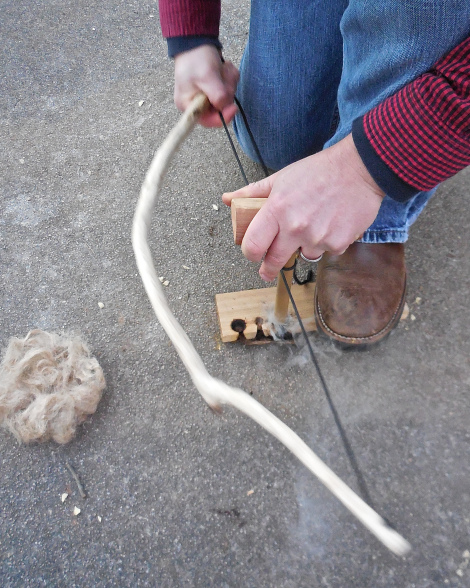
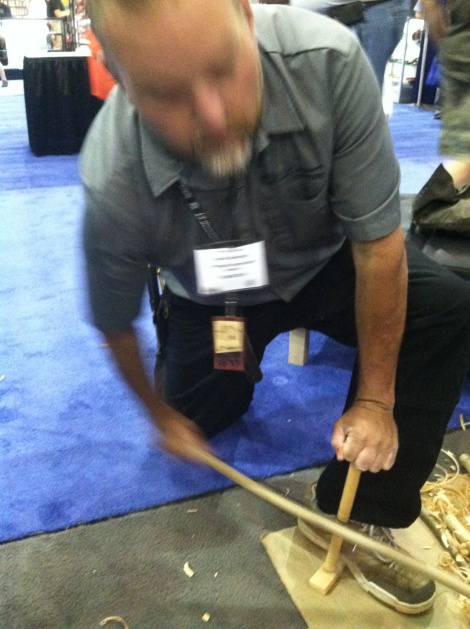
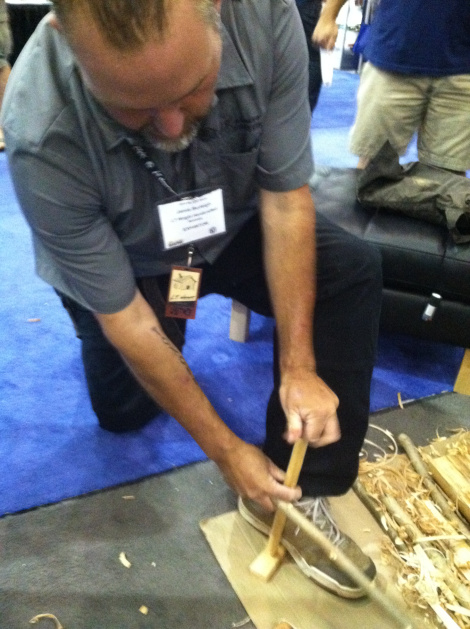
Place the hearth board flat on dry ground. Kneel down with your right knee on the ground and place your left foot on the board about an inch from the pilot hole on the board. Your right thigh should be near perpendicular to the ground and in line with your left foot.
Load the spindle into the bow. Place the eraser end in the pilot hole divot with your left hand and hold it steady. Sit the bow on the ground and hold the spindle with your right hand. Place the bearing block on top of the spindle and grab the bow with your right hand. This may seem like overkill, but I’ve seen many beginners who needed three hands to get their bow drill ready to go.
Before you begin bowing, brace your left wrist against your left shin when the spindle is in the pilot hole. The drill should be perpendicular to the board. Catch your breath and reflect for a moment on what you are about to create from nothing.
With the spindle braced against your left shin which is vertical over the hearth board, start moving the bow back and forth in a slow, controlled sawing motion. Use the entire length of cordage and not short strokes. Be sure to keep the bow moving horizontal over the ground. The bow string should be at a height just above your left boot, shoe, or bare foot as it spins the spindle on the hearth board.
Continue this controlled bowing until you’ve burned in a ball and socket joint where your spindle and hearth board meet. In plumbing terms, the male end (ball) has successfully mated with the female end (socket). The resulting hole should look like a dark, circular pie.
Slice the Pie
Now that you have a round pie hole burned into the board, you need to cut a slice out of the pie. Score the outside edge of the board as if you were cutting the pie in half. This score mark will be the center of your slice of pie. Move to the right and left the center mark about a 1/4 inch and begin cutting into the center point of your pie hole. Rocking motions with your knife help cut across the wood grain.
The notch or slice of pie should be a 45 + degree wedge cut almost to the center point of your pie. Take your time and make the notch walls as smooth as possible. This notch is where the charred dust will collect while bowing.
One additional tip. Chamfer the bottom of the board’s outside edge an inch or so on both sides of your notch. This allows extra air to flow to the dust pile. Fire needs air, fuel (dust), and heat (friction) for ignition.
Bowing Technique
I can’t emphasize enough the importance of prepping your tinder material before you start bowing. A double handful of your finest, driest tinder should be prepared before bowing begins. Nothing kills your primal fire enthusiasm like working to create your first ember and then have it fail due to marginal tinder prep.
Place the hearth board flat on the earth with the notch facing towards you or away. Either position is fine. Place your Welcome Mat under the notch. Load your spindle into the bow and assume the same stance used to burn in the hearth board.
Crouching over the set with your chest resting on your left thigh will cause your left arm to bend and require more forearm exertion to place pressure on the socket and drill. Keeping your back straight allows the left arm to be extended while anchored to your left shin. Increased pressure can be applied by leaning your bodyweight forward saving your forearm.
Grip the bow with your right hand and begin smooth, long strokes. Your heating the “ball and socket” joint only at this point. Smoke will begin to appear and thicken. Speed up the bowing and apply more downward pressure on the drill.
Charred dust will accumulate in the notch and spill onto the Welcome Mat. When the collected dust begins to smoke, stop bowing. Congrats! You’re male and female connections have created a baby ember!
Don’t celebrate yet. Keep your foot on the board and gently remove the spindle and set it and the bow aside. Hold the board in place with your hand as your remove your foot so as to not disturb the baby ember.
Tap the top of the board lightly to loosen the dust from the notch and lift the board away from the Welcome Mat. No need to rush. The baby ember will smolder and eat the charred dust as its first meal. A few fanning motions with your hand will make it glow and weld the dust together.
Carefully transfer the smoking pile of dust and ember from your Welcome Mat to the center of your tinder bundle. Swaddle the ember with the sides of the tinder material with cupped hands so that your precious baby ember doesn’t fall out. Hold the bundle face-high, pucker your lips, and blow through your gently cupped hands as if your were whistling quietly.
Continue to blow until the baby ember ignites the tinder material and you’re holding a handful of burning stuff. Place the flaming bundle under your prepared fire lay, step back, and let it eat.
Now you can give us your best primal scream!
Common Bow Drill Problems and Fixes
The drill flies out of the bow string ~ Fixes: a) the bearing block socket may not be deep enough; b) the pie hole in the board may be too close to the edge or not deep enough; c) your notch is too big – carve a new notch with less angle; d) the spindle is not kept vertical – brace it against your shin vertically; e) the pointy end of the spindle has dulled and should be re-sharpened.
Wobbly drill ~ Fixes: a) brace your wrist against your vertical shin over the board; b) the pie hole in the board is too wide – burn in a new ball and socket joint.
Smoke but no ember ~ Fixes: a) the notch may be too narrow or not deep enough into the socket of your hearth board – widen and deepen the notch; b) moisture may be present in the hearth board – dry it in the sun, or – do slow bowing until you see smoke then rest… repeat this process several times and test the board – or find a dry board.
Smoke coming from the hand-held socket ~ Fixes: a) lube the socket; b) sharpen the pointy end and make sure it is not rubbing on the edge of the bearing block socket.
Can’t blow the ember to flame ~ Fixes: a) you may have marginal or damp tinder – place a fire extender such as char cloth, sooty mold, or 0000 steel wool in your tinder bundle with the ember on top; b) make sure the baby ember hasn’t fallen out of the bundle – it happens.
Persistence will pay off. If you fail, walk away and try another time or day. Keep learning and follow these fundamentals and you’ll join the Primal Fire Club!
If you have questions or need assistance, please don’t hesitate to ask.
Additional Bow Drill Resources:
Video by Feral Woodcraft: Bow Drill How to for Beginners
A Meal Plan for Your Fire
Keep Doing the Stuff of Self-Reliance,
by Todd Walker
If you find value in our blog, Dirt Road Girl and I would appreciate your vote on Top Prepper Sites! You can vote daily by clicking here or on the image below. Check out all the other value-adding sites while you’re there… 
Thanks for Sharing the Stuff!
Copyright: Content on this site (unless the work of a third-party) may be shared freely in digital form, in part or whole, for non-commercial use with a link back to this site crediting the author. All links in articles must remain intact as originally posted in order to be republished. If you are interested a third-party article, please contact the author directly for republishing information.

