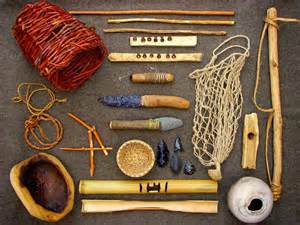
Food is not just a source of energy and sustenance, but a comfort item as well. When you are hungry, morale goes down and chances of survival dwindle. There will be several opportunities to find food after the supermarkets close, you just need to know where to look and what tools to have.
By Regulator5, a SurvivalCache contributor
The first thing you need to know is that meat will only take you only so far. If you read Meriwether Lewis’s journals from their exploration; the men still felt hungry although they were eating several pounds of meat per day. You can eat 10 rabbits a day and still “starve” as rabbit lacks everything except protein for your body’s survival.
Trapping
Trapping is the most feasible option to maintain a steady supply of fresh meat for the “table”. There are several traps and many  more that can be improvised. Many people have trapped animals, even if it was just setting a mouse trap to get rid of a pest. The most important thing to prepare for using traps to supply food is to educate oneself on the habits and lifestyles of the animals in your area. If you must travel to your secure location, remember to research and study the areas for the areas you will need to travel through. My experiences are mostly in the Midwest and Southeastern US, so some tips or items may not be as suitable for a Western environment but I will try and offer tips based on what I have read or been told by trappers/outdoors-men in those areas.
Animal tracks are a sure sign that something is or has been in the area. Tracks can be the obvious footprints in the sand or dirt but can also be as subtle as the scratches on a tree trunk or small holes dug into the ground where your prey was hunting their own meal. Several books are available for studying the footprints of the animals so you can know what animal you are targeting is. I’d prefer NOT to trap a skunk or opossum unless they are my only choice. Time and energy spent on setting traps for the wrong animal are time and energy you will not get back. Also, setting a rat trap or 110 body grip trap for a raccoon or ground hog is wasted time, as you will not be using the proper tools.
There are several different brands and sizes of store bought traps available on the market. The 3 major types are:
1) Foothold traps– These come in a variety of sizes and even styles. There are single jaws (most common) and double jaws; toothed (think of the old bear traps) or smooth jaw; long spring or coil spring. The long spring has single or double long springs which are made by “folding” a piece of spring metal over and then pinching it to allow the trap to be set. Tension is supplied by the animal stepping on the “pan” and releasing the lock, which allows the long spring to expand back to its “U” shape and thus applies pressure holding the trapped animal. Coil spring traps use coil springs either in a double or 4 coil set up. The more coils, the stronger the traps strength to hold an animal, but too much strength can break a bone and thus allow the animal to tear off its foot and escape (thus the legend was born of animals “chewing” their leg off to escape a trap). Trap sizes increase with the “number”. The added weight of the long springs is useful for drowning rig set ups, but coil spring traps are smaller for packing.
2) Body grip (commonly referred to as connibear)- These traps are square in shape and they normally kill the prey upon capture. They utilize 1 or 2 springs and a single trigger/lock mechanism. They come in 3 common sizes, 110, 220, 330, size grows with the number. Some manufacturers have “middle sizes as well, but they are not as common. When selecting these traps, read the description and choose the trap by the opening size (110 = 7inch by 7 inch opening; normally) and what you will need for the animals in your area for planning purposes. I use 110’s for squirrel, muskrat, rabbit, etc for planning purposes, 220 for raccoon, ground hog, fox, etc; and 330 for beaver, coyote, really big raccoons, etc. Some reading this will wonder why I included foxes and coyotes but if you are secure in your homestead and something raids the chicken coop or garden plot; you may have to trap for varmint control as well as food.
3) Snares– These handy gems can be bought already made or obtained by buying the different components and making custom 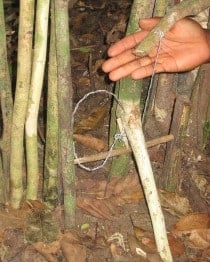 sized snares for game not normally trapped in today’s normal living conditions. Snares are designed to catch an animal as it walks through the hoop of the snare and then being strangled. You can fix these to small saplings or branches being bent and anchored to a stake with a trigger device to spring back to their original position and creating a very fast choke or even breaking the neck of the prey. Most modern snares are made from aircraft cable of 5/32 or 3/16 inch diameter. You can also use heavier gauge as long as it is pliable and you customize the hardware for the thicker cable. Snares can also be improvised from a variety of materials, fishing line being a natural choice. I carry braided line with 60# test or higher for such purposes and also to use for limb lines. Regular sewing thread or light weight (2-4#) fishing line is useful for securing the snare to brush or fencing to keep its shape and stay in place once set. Snares made from 6-10# fishing line works well for birds. For hiking in parts of Alaska and Canada (possibly other locations), it is required by law that you have a couple snares in your pack and the knowledge to use them.
These are the main types of animal traps used for trapping fur-bearers for their pelts. They can add immense possibilities to the prepper for putting food on the table if and when the need arises. Improvised traps are also very important; not only will they be used if caught in an emergency where you don’t have your kit, i.e. an aircraft crash since we can’t carry our kits as a carry on.
Deadfalls are probably the best known and easiest to construct improvised trap. These are created by using an object or 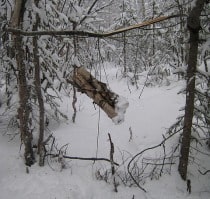 objects that weigh enough to kill the intended target by crushing it. Rocks, trees, branches, cast off equipment or materials (bricks, sandbags, vehicle parts, etc) can all be used for the weight. You balance the weight and attach the bait to a trigger, a type 4 trigger is the most common but takes practice to make, and when the animal pulls on the bait, it causes the weight to fall and crush it. You can also use a manual trigger by attacking a string or rope to the brace and pulling the brace out manually once the target enters the “kill zone.” This can be practiced by using a laundry basket and catching birds in the back yard, great training and practice for the little ones and it will teach them patience and the need to be quiet and still. The basket or a bucket can also be used in a survival situation to catch small animals in the same manner, just know that the target will still be alive and will need to be approached with care.
Pitfalls or punji pits can also be used. These are simple in design but require a lot of work to make. By digging a hole deep enough and covering it so the target does not see it, they can be lured to the pit or dig it along a trail they travel. The pit must be deep enough and/or lined so the target cannot climb or jump out. By adding punji stake (sharpened sticks) to the trap, you will injure, maim or kill whatever falls into the trap. This will help ensure the animal stays but can also become dangerous to unsuspecting people falling into the pit. These are also dangerous to livestock or pets, so use common sense and care when utilizing these traps.
Related:How to Make a Primitive Funnel Fish Trap that keeps on giving.
Fish traps are also a valuable commodity to use for gathering food. These are normally constructed on site, using natural 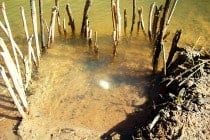 materials combined with brought items. By placing obstacles, sticks, rocks, boards, etc, in the waterway, you funnel the fish swimming through at a certain point. At this point, place a net and anything swimming through will be captured. You can also use fencing [poultry netting (chicken wire) works best for its pliability and small mesh size). Form the fencing into a cylindrical shape and fasten it together with cable ties, rope, tie wire, etc. After gauging the opening size, cut more of the fencing used to form a “funnel” to fit into the opening(s); if only 1 funnel is used, you must form a “wall” on the opposite end to secure the trap. The funnel needs to extend into the trap about 1/8 – ¼ the length of the cylinder and reduce in size down to an opening that will allow the fish to swim in but not so big they can swim out extremely easy. The idea is they will have room to swim out, but by have the funnel opening centered in the trap, most fish will miss the opening and not swim out. You may lose some, but the majority of any fish swimming in will be there when you check your traps. You can add bait by attaching small bags filled with bait to the fencing. I like attaching mine to the bottom to get the fish to swim away from the opening of the funnel. A practice trap can be made by cutting a 2 liter pop (soda) bottle off just after it gets to its full size. By turning this around and inserting it into the body of the bottle with the pour spout inside the bottle, you now have a minnow trap to collect bait. Punch small holes through the bottom of the bottle and sides to allow water to flow through it. I use a small rod of re-bar to anchor this to the creek bed. Secure the cut off portion with glue is best, but if the cut is made cleanly it can be held with friction. Place the opening to the upstream side, so water pressure will build and help hold the top in the bottle body. This will also give a visual of what a bigger trap made from fencing should look like. This type of trap will also catch crabs, lobster, crawdads and even some small marine mammals.
Traps can more than pay for themselves on the return of food and even pelts for clothing, pot holders, blankets, etc in a survival situation. There are several books on the subject written by people with a lot more experience than me. If possible and legal to do so, practice trapping animals before the need arises and your learning curve means whether you and your family eat or not. You can get clips to hold body grip traps in the “set” position on the side of a tree. Bait the trigger wires with corn or nutmeats, even peanut butter, and squirrels will come to feast on your offering and roasted squirrel or stew is on the menu. The clips are sold via trapper supply houses for marten and fisher trappers. The clips can also be improvised out of small pieces of conduit or pipe. The spring on the body grip trap can have a rope tied to it and secured to a branch so it will swing the trap and your catch away from the tree to keep scavengers from easily stealing your meal. I carry a few premade snares, two 110 sized body grip traps and 1 #4, four coil trap in my rucksack or in my MOLLE vest. I also carry heavy weight (60# +) braided fishing line to improvise snares. I carry lighter weight fishing line for snares for birds or to use as sewing thread to repair clothes or gear. Remember to get repair parts for any traps you have and acquire the skill to repair them.
Fishing
There are several articles written, as well as countless books, on the subject of fishing. I will only briefly touch on the subject. I 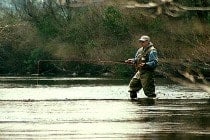 recommend using limb lines in a survival fishing situation. You use a heavy weight line and attach this to a very sturdy branch overhanging or very near the water source. I prefer one with a little flexibility to allow for the fish to fight without breaking or ripping the hook from its mouth. Limb lines can be utilized using normal store bought hooks or improvising natural materials into something to hold the fish. “Skewer hooks” can be made easily and very quickly, even by a child. You take a piece of wood and sharpen both ends to a dull point. You can rough up the “barrel” of the wood to help hold the bait or even tie the bait on with string. You attach the line by tying it around the barrel in the center of the piece of wood. When the fish swallows the bait and the skewer, it will lodge in its throat or guts, depending on size of fish. When you pull the line, it will cause the skewer to turn sideways and thus make an extremely strong hold on the fish allowing you to haul it in. If using limb lines in waters with a large turtle population, they can be used to catch turtles as well, but I would recommend using steel leaders to help keep the turtles from biting the line off.
Treble hooks work extremely well, but until used for a true survival situation, they are normally illegal, so check your local laws. You can also cut pantyhose down, tie it around the bait and use it to help keep fish from stealing the bait. Safety pins and needles can also be used to adapt something from its intended purpose to use as a makeshift hook. These will not be barbed, so extra care is needed to maintain control over your fish once caught. I would also recommend buying and using cane poles even during routine fishing outings. I love my spin cast and bait cast reels coupled with a good rod, but if they break, a branch more closely resembles a cane pole than a $300 rod and reel combo. Throw nets or casting nets are also valuable in obtaining fish. These do require practice, but the return can be very rewarding and the difference between a full belly and an empty one. I’d even try and obtain topo maps of the lakes, rivers, streams, etc for the area you will be when the need arises. This will give you bottom structure and locations for optimum limb line locations.
Hunting
Several articles have been written and posted on hunting. This is the method most people plan on obtaining their meat in a 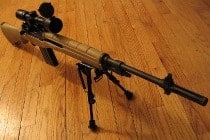 survival situation. Study the animals in your chosen area and learn all you can about their habits, food sources, activity cycles (nocturnal or diurnal), and home (burrows, nests, meadow, water, lodge (muskrat and beaver), etc). Choose a weapon that will easily take the game animal but not ruin the meat; you do not want to hunt a rabbit with a .308 or a 12 gauge slug. A .22 long Rifle will take most animals, even deer, with proper shot placement. Using a .22 LR are illegal to take certain game, so read game laws before using in a non survival situation. If I was able to choose just 1 higher powered rifle, I would choose a .308 Win./7.62mm. They are available on an AR platform for those who want the self loader or even the battle proven M14 (Springfield’s M1A1). A bolt action would be fine or even a pump. The reason I would choose the .308 is several fold; 1) They are a common caliber and ammunition will be available; 2) They have much more range and power over the .223/5.56mm, I can hunt medium game like antelope and deer with a .308 but would NOT want to tackle a moose, elk or bear with a .223; 3) The added firepower will allow me to keep the 2-legged varmints farther out of their preferred range and in the ranges I practiced at before I had to use it. Optics are also a requirement in my opinion. A good survival rifle will have open iron sights as a backup, as scopes get broken, but optics allow for a more accurate shot placement when the adage of “every shot counts” is truly “gospel” in a survival situation. Ammunition can be in very short supply and harvesting that game means you and yours eat is not the time to try shots that you can brag about, the only bragging that needs done will be when you carry in that nice venison haunch.
Blackpowder weapons will be an excellent choice for a survival weapon if you also gain the knowledge to make your own 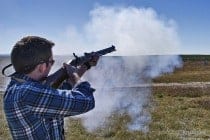 blackpowder and cast your own lead balls. I would recommend a flintlock over percussion cap. Flint can be picked up in just about every corner of the US. By casting your own lead balls and making blackpowder, you can have a long term firearm to hunt with and conserve your center fire ammunition for real emergencies and self defense. Muzzleloading weapons act and shoot differently than center fire weapons; flintlocks can have a “lag” between the time you pull the trigger and the time the powder actually ignites to propel the ball down the barrel. If you choose to use this type of survival tool, please get one as early as possible and practice to learn the intricacies of this traditional food gatherer.
Archery equipment, especially the knowledge on how to build self bows such as the Native Americans, would be a great asset. They are quiet, can take a multitude of game, can be replaced (if capable of making them) and arrows can be made also. Their use will save ammunition for self defense and extremely dangerous game (bears, mountain lions, wolves, feral dogs, etc).
Do not underestimate the power and ability of a slingshot to put dinner on the table. It is easy to find ammunition; any rock will do and are perfect for the younger hunters. They are quiet and capable hunters, especially when using lead round balls. They are modestly priced and found at almost every discount and department store. You can “store” vast amounts ammo for it and nobody be the wiser; just do some landscaping and use river rock instead of mulch.
Regardless of equipment and tactics, make sure you get as close as possible and take the sure shot. Those nice antlers only mean you can make another tool, while does and yearlings usually have more tender meat and are an easier quarry. Always choose the sure shot. Other uncommon tools for hunting include, spears, air guns, boomerangs/throwing sticks, and even a bolo. The biggest thing is to practice with whatever method(s) you choose so as to be an expert in their use as there is NO substitution for knowledge about your intended game animal(s).
Related:15 Top Wild Edibles That Can Save You in the Wild
Gathering
Gathering wild edibles will greatly enhance your meals and chance of survival. Several books are written and a must have at  least in the survival retreat or Bug Out Location (BOL). I would also find a small one to keep in your Bug Out Bag (BOB) like the book from Judy of the Woods. Sassafras root makes a good tea and even chewing the leaves will cause saliva to be generated to help reduce thirst or just give you peace of mind from food, similar to chewing gum. Cattails are one of nature’s greatest survival gifts. You can eat the young shoots, the roots are like a potato, and even the seed (the part on top that gets to looking like a dusty corn cob) is a great flour additive, added to stew or can be eaten on its own. Some other plants to learn and know are: Solomon’s Seal, May Apple, wild berries, any nut tree, pine needles (for tea), pine cones for pine nuts (place a “closed” pine cone near a fire and they will “open” to obtain the nuts/seeds inside), birch sap (can be made into a great syrup for your acorn pancakes), wild mint, swamp cabbage palm in the southern swamps, fish eggs, mushrooms, etc. These items are edible in whole or in part and will provide extra flavor and much needed calories in an emergency. Please read books or find someone who can give precise instructions on edible plants and try them before it becomes necessary.
Remember, all bird eggs are edible; many are small but they will provide calories and much needed nutrients. Eggs dipped in wax can be held up to a month without refrigeration or spoilage. That little extra bird feed and the bird houses while times are good; could be a bountiful investment for when times get bad. I would also recommend books on wild herbs to help with the seasoning of food and natural medicine once the pharmacy is looted.
Gardening
Gardening has been covered in depth, so I will only add to the obvious benefit of growing food, the garden plot will bring in 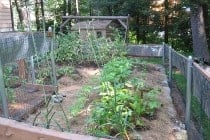 wild game to trap or hunt. Also, planting fruit trees in advance will supply fresh fruit to the diet and animals will travel long distance to eat a sweet dessert like an apple. This will bring the game to you and thus reduce risk and visibility by having to venture further and further from your secure location. I would also think about establishing a pond for fish farming and if the space is available, digging deep ditches for irrigation and drawing animals for water. Dams can be used to control water depth.
Also, if able, a greenhouse will allow year round growing. You can add bee hives to the greenhouse and the bees will pollinate the crops and give you a natural sweetener. Honey also has many medicinal uses and when the going gets rough and many comfort items are no longer available, who wouldn’t want something sweet to help boost morale?
Livestock
Raising livestock is also important, but does require land to use as pasture. Goats would be a prime animal, they will supply 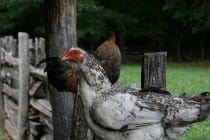 meat, milk and depending on the breed, wool to make cloth from. This all takes more knowledge and land, which some of us may or may not have. Poultry will help eat bugs in the garden, supply meat and eggs, act as an alarm system (geese and guineas), eat weeds from the garden (geese), and can supply down for quilts if the situation turns into a truly long term event.
These are but suggestions to stimulate ideas and comments from others to bring a more balanced and as close to full thought process on the subject of feeding ourselves in the worst of times. Everyone’s location and access to land and other resources will dictate how we must personalize any ideas to meet our needs, abilities, and resources; not all can afford to dig ditches and a pond or have the land to do so. I hope I have helped some or maybe caused others to think in a direction they had not thought of. My purpose is to give basics to those who are starting, maybe add some insight to those who have not been able to experience some of these skills, and caused the experienced to share their ideas or knowledge in comments of things they have actually tried or even heard of so the group gains the knowledge to try or research tricks or skill sets that will help them survive.
Summary
I have eaten ground hog, raccoon, snake, fish, alligator, squirrel, rabbit, beaver, muskrat, crawdad, crabs, lobster, wild boar,  deer, moose, elk, bear and even a rat to cover most of my vittles in the past. Those who hunt, try carrying your day-pack and other gear (where legal) while doing so. This will allow you to see how it affects your shooting and whether the game animal will be spooked by what you have. Sound is your enemy, so tie everything down secure. When squirrel hunting, I wear my MOLLE vest, carry my emergency survival gear and a sidearm (especially handy because of the feral dog problem). I hunt with either a 22 LR rifle (normal) or pellet gun. This allows me to continually improve my ability to move quietly through the woods while wearing the extra gear I will have when the situation(s) we prep for become a reality. Also, if you have them, take the kids; the younger the better. They will learn to move quietly and be still, get satisfaction in knowing they helped “earn” their dinner and it creates a bond not easily broken. If you find it difficult to be patient with them when only a successful hunt is on the line; how will you react when the very meal you MUST have is cost? Each child is different and will handle the experience differently. You must decide when they are ready to see an animal harvested and then again when they are ready to witness the butchering process. I prefer skinning and gutting my game in the field, innards stink when in your garbage at home, but in the survival situation, they become bait for traps or fishing. Animal stomachs, turned inside out and washed very thoroughly, make excellent pouches and/or water bags. Learn to skin the game as cleanly and whole as possible to save the pelt. Rabbit fur is soft and works well for mittens, ear muffs, etc; ground hog hide is extremely tough and makes good leather lace.
Stay Alert, Stay Alive
by Regulator5


