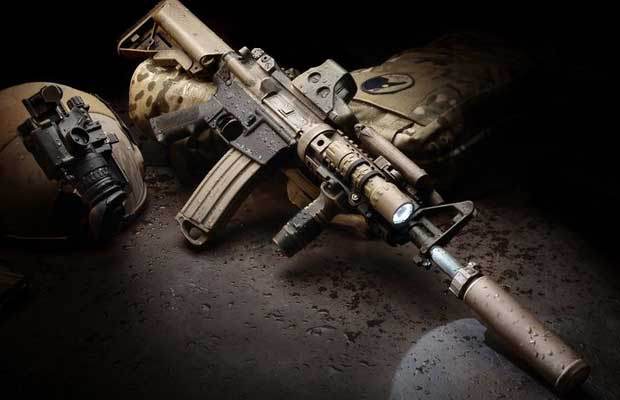
Whether you like it or not, you have to admit that the AR-15 is the rifle of choice for the majority of preppers nationwide. It’s adaptable, it’s easy to handle, easy to shoot well, and the sheer numbers of them out there mean that any prepper undermost circumstances should probably have one in his arsenal.
If you DO have one, you should know how to work on it. You may love yours to bits; you lovingly selected every part, widget, accessory, and optic on your AR. But if the balloon goes up and yours breaks, you can’t exactly roll down to the local gun shop and expect the gunsmith to fix your problem while you wait. You may find a parts gun in an abandoned police cruiser or National Guard armory that will work on your gun (most are Mil-Spec and therefore mostly interchangeable)…but who’s going to work on it? Guess what, buddy: you are. Luckily, the AR platform is pretty easy to work on.
I keep a smattering of easily-replaced (read: field-replaceable with little or no tools) parts in the Magpul ACS stock compartments of my go-to rifle, along with a cut-down 1/16″ punch, which lets me work on most of my AR with maybe a convenient rock utilized as a hammer. But those parts and punch are useless without knowledge.
What’s that? You have an AR as your go-to SHTF rifle and you can field strip it, but really not much else? Well, let’s start fixing that problem. And we’re going to start the process with learning about the most crucial element of the AR-15/M4 system: The Bolt Carrier Group, or BCG.
First, we’re going to assume that you can remove your bolt and charging handle from the gun in the normal field-stripping procedure. Do so. You’re going to need a couple specific things, one of them being a 1/16″ or 3/32″ drift punch…this should be relatively easy to come by at your local hardware store. Make sure you get a good hardened one; cheap ones bend and snap very easily. A small hammer will probably be needed, as well as a few cleaning patches, a bunch of Q-tips, some gun cleaning solvent, a light, high-quality gun oil, and a small scraping tool (I use a jeweler’s screwdriver.) A dedicated AR-15 multi-tool is a godsend; I heartily recommend one! Let’s get started.
Disassembly
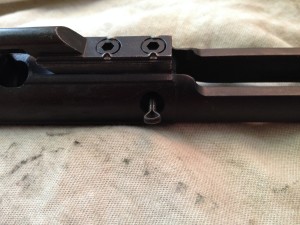
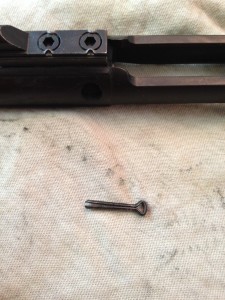
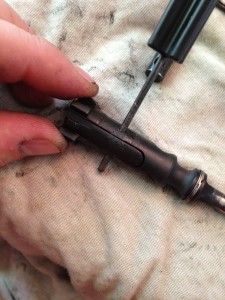
First, we’re going to pull out the Firing Pin Retaining Pin. This is a small, cotter pin-like affair that is recessed into the side of the bolt. Using a punch, pry it out.
A word about this pin: it is a hardened pin; if it breaks somehow, you’ll need to get another AR-15 specific pin. Just going to NAPA and getting a cotter pin won’t work. Those are soft, malleable metal and will break very quickly. Firing Pin Retaining Pins are cheap, so there’s no reason not to buy a few of these expendable parts and have extras.
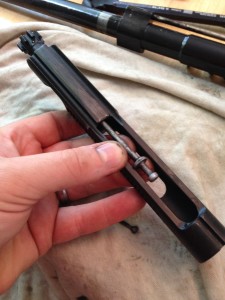
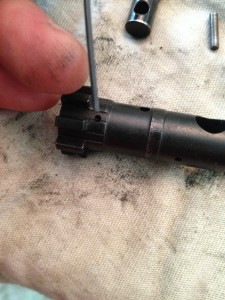
Next is the ejector. I usually don’t pull out the ejector on routine tear-downs, but it’s easy to do. Drift out the tiny roll pin indicated below (keeping your thumb over the ejector! Serious spring tension here!) and pull the ejector and its spring out of the front of the bolt. Take note of the orientation: There is a notch in the ejector for the pin, and it needs to go back in the same direction it came out so things will work properly.
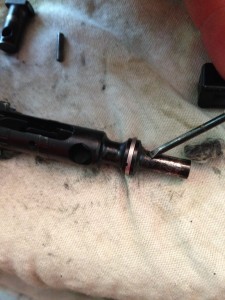
I also don’t pull the gas rings off – there are three of them; you can see them as a slim silver band towards the rear of the bolt body in the picture below. If you need to remove them, use a dental pick or something similar to pry them out of the groove, then peel them out one by one. These rarely need to be replaced unless the rifle is seriously malfunctioning, so I leave them alone generally.
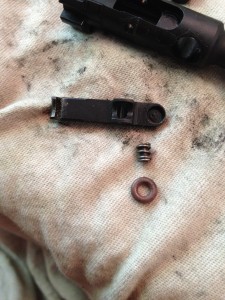
The extractor houses a couple extra parts: the extractor spring, the extractor spring buffer that resides inside the extractor spring, and usually a rubber O- or D-shaped ring that sits around the extractor spring. This O-ring really helps the extractor spring out in the power department, and it’s easily retrofitted if yours doesn’t have one. The Extra Power upgrade kit is, once again, very inexpensive, and cheap insurance against failures to extract. Grab a couple and keep a spare.
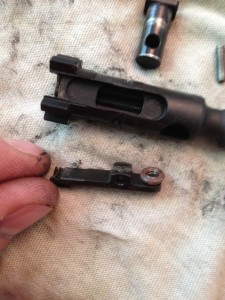
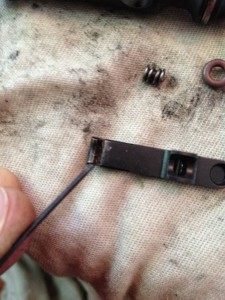
Let’s start with that extractor. The groove in the underside of it catches the rim of your case and pulls it out of the chamber. If that groove has crud built up in it, the extractor cannot properly grasp the rim of your expended cartridge, and you will have a failure to extract, probably followed by the next round from the magazine being fed into the back of the case that didn’t extract. And that, my friends, is a whole lot of suck.
We can prevent that from happening by simply cleaning the extractor groove. Take a small screwdriver, a toothpick, dental pick, whatever – and scrape the gunk out. Use a Q-tip with powder solvent (such as my old friend, Hoppes #9) to break things loose if it’s really built up.
Use a Q-tip or two and clean out the extractor cutout in the bolt body for good measure. I will put a very, VERY light coat of oil or none at all in the extractor cutout. Oil attracts dirt and grime, and dirt and grime will impede the extractor from properly actuating in its cutout. I do, however, put a drop of oil in the hole the retaining pin goes through, so it will pivot freely when assembled.
Use a small screwdriver or scraper tool to remove hardened carbon around the bolt here.
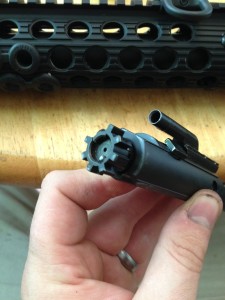
When cleaning the bolt, you need to get all the built-up hardened carbon off the “tail” of the bolt, as shown above. I soak it down with Hoppes # 9 or a cleaning patch, then scrape it away with a small screwdriver. This is one of the important areas on an AR bolt: if this is allowed to build up with carbon, it will eventually impede backwards progress of the bolt in the carrier body, and the gun will not function. Use a Q-tip and clean out the hole for the Bolt Cam Pin, and all the locking lugs on the head of the bolt. Clean the bolt face as well.
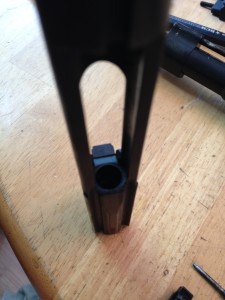
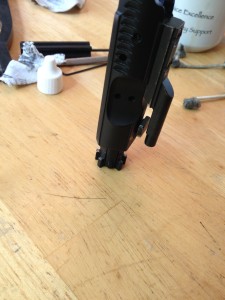
Make sure this end of the bolt head is nice and clean as well. (Yes, I know the BCG is assembled.)
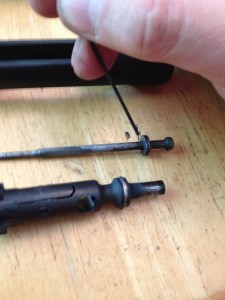
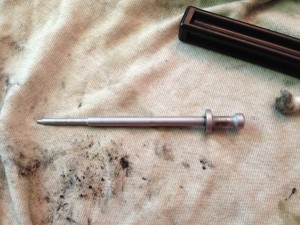
When cleaning the firing pin, make sure all the carbon is cleaned off of it. Again, if it’s loaded up with grime, it doesn’t free-travel inside the bolt and the gun will not function.
I make sure the bolt is nice and dry, with no cleaning solvent residue anywhere, inside or out. I will usually heat the big parts (bolt and carrier) up inside my oven (don’t tell my wife) at about 170 degrees to open the metal’s pores up, then I’ll use Militec-1 or FrogLube or a similar metal-penetrating lube oil lightly on these parts, inside and out. I let them cool completely to close the pores, then thoroughly dry off the excess, with just a light coating of lube on the outsides of the parts. The main thing is not to leave enough lube on the parts to attract dirt, sand, etc., but to have enough for the parts to not wear as they actuate, nor corrode if they sit for a while. I put a drop of high-quality gun lube (like the aforementioned Militec-1) on the Bolt Cam Pin as well. I like to leave the firing pin clean and dry, with no lube on it to attract anything that will impede its moving freely.
Reassembly
The bolt is kind of a reassemble-in-reverse-order setup. Install the ejector (if you pulled it), then the extractor and its spring, buffer and O-ring. Put the bolt back into the bolt carrier, making sure the extractor will be facing the ejection port of the rifle once it is installed. This is important for the function of the rifle. If the bolt head is in 180 degrees off, the ejector will punch the fired cases back INTO the rifle instead of out of the ejection port. We don’t want this, for obvious reasons.
Insert the Bolt Cam Pin as you took it out, rotate it 90 degrees so it will clear under the gas key, and then install the firing pin into the back of the bolt. Make sure it slides back and forth freely, then install the Firing Pin Retaining Pin in the side of the bolt.
The bolt should slide back and forth, and rotate freely in the carrier, with some resistance. To test if the gas rings are good, extend the bolt fully out of the carrier, then set the bolt down on a table or flat surface. Gravity should not let the bolt carrier slide down on the bolt; it should stay fully extended. If it does slide down, it’s time to replace the gas rings on the bolt body.
That’s about it! Re-install the bolt and charging handle in your rifle, and make sure everything functions as it should. Then go shoot the hell out of it and get some training!

