There’s nothing more delicious and versatile that pasta. You can use it to make lasagna, spaghetti, macaroni and cheese or simple yet delicious rustic dishes made only from the ingredients in your garden. The only problem with using pasta for survival is that the boxes are so bulky that it’s difficult to store much of it. Today we’re going to tell you how to make and preserve pasta for survival.
One of my fondest memories is sitting in the kitchen with one of the best cooks that I’ve ever known and learning all of his techniques. Making pasta was one of his greatest skills and he said that he loved it because it required very few ingredients, the dough was easy to make, and he could make it in any shape that he needed to. He also made all of his pasta without using a machine!
Though having a pasta maker will most certainly make your life easier once you learn how to use it, it was a frustration for me because I kept tearing the pasta. After attempting it a few times, I gave up and went back to the way that I was taught in the beginning. If you want to use a pasta machine, feel free but since this is about survival, your machine may break so we’re going to talk about doing it all by hand!
You won’t need many ingredients: flour, eggs and (optionally) salt. I like to add it because it adds flavor already. Let’s talk about flour for a minute. All-purpose flour is just fine for a basic pasta mix. If you want to add texture and a bit of hardiness to your pasta, you can add some semolina flour to the mix. If you want silkier pasta for a more refined noodle, add some cake flour, or 00 flour.
Some people like to add oil, but it’s not essential to making basic pasta and may be scarce in a survival situation. (I can already hear the gasps of some of the best Italian cooks I know – please don’t stop feeding me because I’m trying to keep things simple here!).
Once you get the hang of making your own pasta, you can experiment with adding herbs and other ingredients such as pureed spinach to make the fancy stuff, but let’s get the hang of the easy pasta first.
We’ll start with a small batch, three servings, so that you can work easily with the dough and have plenty of space to dry it even if you live in a small place. Here’s the recipe:
- 1 cup flour
- 1 extra large egg, beaten
- 1/2 teaspoon salt
Here’s the thing – making any kind of bread-like dough using a recipe is tricky and imprecise. There are just too many factors that can affect the texture of the dough. It could be humid, your eggs could be large or small or whatever.
 My point is that you need to focus less on precise amounts and more on the texture of your dough. By the time you’re done, you want a dough that is moist but just dry enough that it doesn’t stick to your hands or your rolling pin. If you need to add a bit more flour to get that, do so. If you need more moisture, add a teaspoon of water at a time or some beaten egg or an extra yolk.
I like to use the “well” method of combining the ingredients though using a bowl works, too.
- Pour your flour onto a dry, clean surface such as your counter.
- Start in the center of the flour and make an indentation big enough to hold your eggs, with the sides higher than the center.
- Add your beaten egg and salt. (you don’t necessarily have to beat the egg first, but I find that it’s easier and quicker to do so)
- Use a fork to start folding the flour into the egg and combining them.
- Once you have them sufficiently combined that you can use your hands without making a sticky mess, start kneading with your hands.
- Scrape the flour off the surface as you go to incorporate it into the ball. If the dough is sticky, add a bit more flour; if it’s so dry that it won’t hold together, add more liquid.
- Knead by pushing with the heel of your hand, then folding it over, rotating about 45 degrees and starting the process again.
- You’ll need to put some effort into kneading because under-kneading the dough won’t activate the gluten and give you that springy snap that will make your dough hold together and have a great texture once it’s cooked. About 10 minutes of kneading will do.
- You should now have a smooth, elastic ball of dough that’s moist but not wet, and that holds together in a nice ball without being so dry that it crumbles.
- Wrap it in plastic and allow it to rest for at least an hour, but no more than a few hours. This allows the gluten bonds to form and the moisture to absorb throughout the ball. In other words, it allows your dough to mature.
- Smile – you’re through the boring part and now you get to play with your food!
- Lightly flour your surface and roll your dough, starting in the center and rolling it first backward, then forward and to the sides. Try to keep the dough in a roughly rectangular shape at least 6 inches on the one side.
- Lightly dust the top of your dough with flour then, starting at the short side, GENTLY fold your dough over in 2-inch intervals until it’s rolled up.
- Slice into 1/4-1/2 inch strips, keeping them as even as possible. Separate the strips.
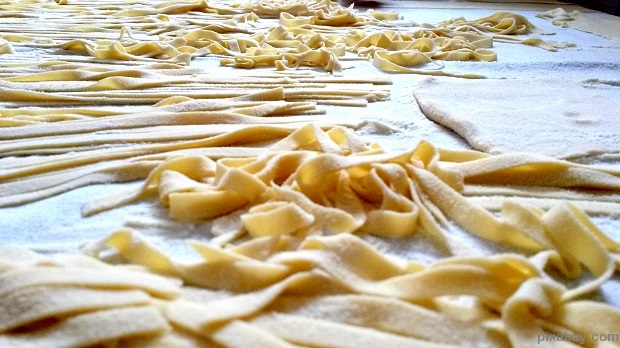
- You now have two choices – you can cook your pasta to see if you like the taste before you make more (which I recommend) or you can hang from a string or a coat hanger in a single layer and allow to dry until all the moisture is completely gone and it breaks like store-bought pasta.
- Seal in an airtight container until you’re ready to use it. It’ll keep almost indefinitely.
Some tips – if you find that the dough is too snappy and is difficult to roll out, add a tablespoon or so of olive oil to your next recipe. It will help it to keep from rolling back in on itself but will also make the dough a bit more difficult to work with when kneading. Also, olive oil may be in short supply if SHTF, which is why I consider the recipe that I used to be pasta for survival. It may be worth the trade-off though.
Egg yolks add a nice structure; as a matter of fact, when doubling this recipe, experiment with adding 2 yolks for each whole egg to see how different the dough becomes.
Using just egg whites yields a watery dough that makes a mushy pasta. Don’t skip the yolk in the interest of “healthy” pasta.
I used the old-school drying method because if SHTF, you may not have an oven. If you want to hurry the process along, you can lay the strips of pasta on a baking sheet and dry slowly at 150 degrees for a few hours.
Pasta is a great survival food because it’s so versatile and can be made with simple ingredients that you’ll likely have at hand, at least if you have your chickens on your homestead. Since you can use it in so many different ways, food fatigue won’t be an issue and you don’t need any special equipment to make it. It really is a fabulous survival food to have in your recipe arsenal.
If you have other suggestions for making or drying pasta, we’d love to hear about them in the comments section below!
This article has been written by Theresa Crouse for Survivopedia.
About Theresa Crouse
Theresa Crouse is a full-time writer currently living in central Florida. She was born and raised in the hills of West Virginia, where she learned to farm, hunt, fish, and live off the land from an early age. She prefers to live off the grid as much as possible and does her best to follow the “leave nothing behind but footprints” philosophy. For fun, she enjoys shooting, kayaking, tinkering on her car and motorcycle, and just about anything else that involves water, going fast, or the outdoors. You can send Theresa a message at editor [at] survivopedia.com.


