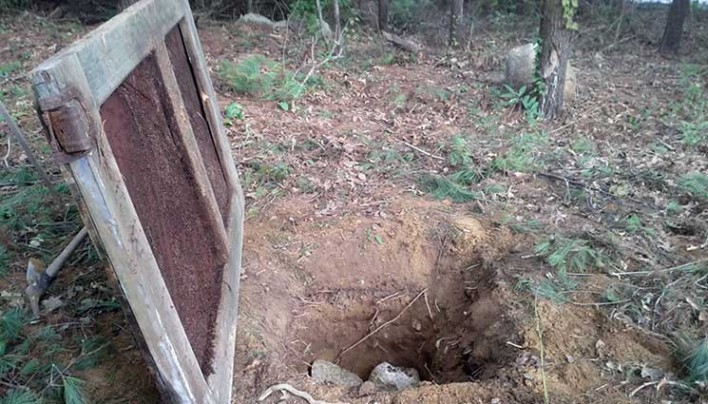
Squirrels may ravage my garden, but I do appreciate their ability to store for winter. My ancestors did too–storing their harvest in self-dug root cellars. Here in Massachusetts, our winters are too chilly to keep crops in the soil, covered with straw, as they did in England. So the American colonists watched the squirrels put their acorns in holes and promptly did the same.
Root cellars make use of the consistent temperature and humidity present just a few feet beneath the soil. Most cold weather vegetables thrive in these conditions, thus allowing them not only to be stored throughout the winter, but remain alive, with all of their nutrients intact. Why buy plastic-tasting vegetables that have been shipped thousands of miles when you can have your own fresh, living ones just a few feet from your front door?
Root cellaring is essential for eating seasonally. It is one the cheapest methods of food storage, and is arguably even more effective than a refrigerator. Root cellars are also adaptable to any terrain or budget. They can be as large as an underground room, complete with ventilation shafts and shelving, or they can be as simple as a hole dug into the ground with a bin put inside. The latter is the route that I took for my own project.
Materials
- Large Bin or Barrel
- Rocks (preferably flat)
- Hay or Pine Needles
- An Old Door
- Something to Store (like potatoes)
Tools
- Tape Measure
- Shovel
- Pick
- Wheelbarrow
Method
First, choose a location that won’t flood and that you won’t mind trudging to in the middle of the winter. I chose a clearing in the woods just fifty feet from my front door. Remember, if your root cellar isn’t convenient, you’ll never use it.
Next, start digging. The size of your hole will depend upon the size of the box or barrel you plan on burying. Dig a hole larger that the box on all sides, and make the depth at least five or six feet from the surface. You’ll go through a few different layers of soil, but hopefully, you won’t hit any heavy ledge.
Don’t dig too deep or you’ll find yourself with a well rather than a root cellar. And take care not to leave your hole unoccupied or uncovered. You don’t want anyone getting hurt.

After your hole is clean and square, fill the bottom of it up with about six inches of large rocks or crushed stone. This will give excess water somewhere to go so that you do not make vegetable soup prematurely. The stones will also draw cool air up from the soil and further insulate your crop.

At this point, you need to begin preparing the vegetables you intend on storing. Since your root cellar can be accessed at any time, you can always add to it. However, some vegetables must be stored differently than others, so this must be a consideration when you are planning what to put in your bin. Information on how certain vegetables should be stored can be found in many different books.
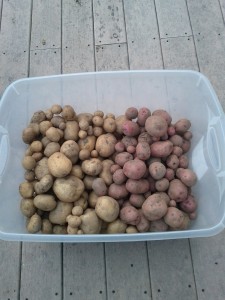
In my own cellar, I stored my potato crop. Unless you’re storing massive quantities of potatoes, you can keep them in bins without any special treatment. After digging, allow them a day or so of curing outside. Use up any potatoes that you accidentally nicked or bruised rather than storing them because they’ll rot. Beware squirrels, along with excess sunlight, which can turn them green and poisonous. Once the skin of your potatoes has thickened up, you can carefully add them to the bin.
 |
 |
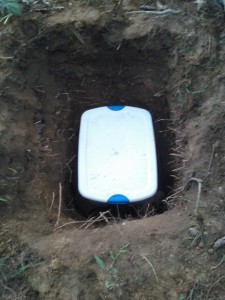
When you’re confident with your hole and veggies, gently place your bin or barrel onto the rocks. It’s not a bad idea to fill in around the barrel with more crushed stone, but since I didn’t have much on hand, I decided to forgo it.
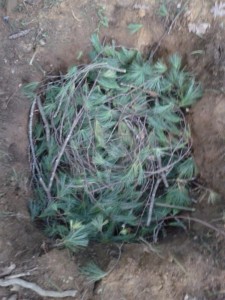
Now cover your bin with straw or hay. Since I had neither of the two, I used pine boughs, which worked the same and were actually easier to remove when I needed to get in the bin.
Finally, you will need to cover the hole with something solid. I happened to have an old barn door lying around, but you can use anything from an old car door to a big sheet of plywood. Just make sure that it covers the hole completely to prevent water seepage and critters from venturing down there. If you’re really crafty, you could even put a whole door with the frame on top so that you can just open it rather than having to flip the door over. Either way works.
Also, you may want to leave a tiny crack for air flow, but cover this loosely with some pine boughs or hay. And when the cold weather really rolls in, throw a couple of hay bales on top of the door to fully insulate the cellar. Remember, we are trying to preserve that steady cool that exists naturally beneath the earth. Any hot or frigid air from above might disrupt the environment, spoiling or freezing your veggies.

Check on your root cellar every once and a while, and remove any spoiled produce. One bad apple truly does ruin the lot.
Happy storing and winter eating!
Written by a 60 year-old nuclear safeguards inspector this program is unlike anything you’ve ever seen before. It makes use of a secret building method discovered by a one-legged war veteran that enables anyone to build a bunker and root cellar without a lot of money or any hard work. Finally, you’ll sleep easy at night knowing you have your own hidden stronghold, where you and your whole family can take shelter from looters, hurricanes, tornadoes, and even nuclear fallout. And the best part? Your Easy Cellar will also keep every one of your supplies safe year-round and prevent them from spoiling…even without any electricity.
by Pat Henry

