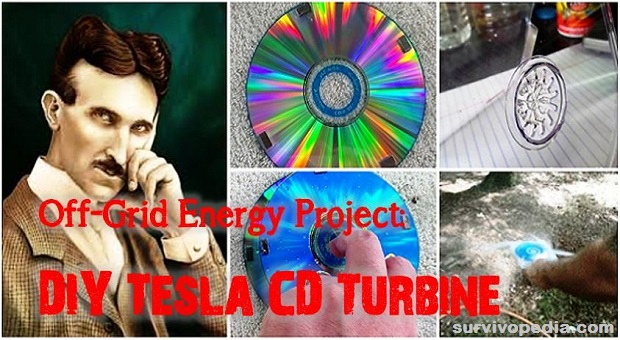
Even though you may marvel at modern computers, power plants, and other devices, our species should have been much further along than it is at this stage. You will find that some of the greatest inventions in power generation were never developed because of politics and ego games played by the likes of Thomas Edison as part of his quest to destroy Nikola Tesla.
Nevertheless, Tesla’s patents still exist, and amateur electronics hobbyists are reviving some of his greatest inventions. This includes the Tesla Turbine, which does not require a centralized shaft and can run as easily on air as it does water.
While Tesla’s original turbines were built using metal disks and heavier machinery, working units can also be built from smaller parts like CDs and magnets.
How and Why It Works
Windmills, steam turbines, and many other devices rely directly or indirectly on air, water, or something else striking a blade mounted to a central shaft.
As the blade moves, the mechanical force is converted to electricity via magnets and coils, or it can also be used to propel wheels.
The Tesla Turbine is different in the sense that air and water do not strike a blade. Instead, some of the air or water pushes the outer edge of a disk, and the as the rest is pulled between the disks, flow is converted into tighter spirals which generate centrifugal force.
As the disks spin, the spirals become tighter, which increases rate of speed. Once you have a spinning motion, magnets mounted on the disks produce current in stationary coils mounted on the outside of the case. Alternatively, you can use magnetic coupling to drive motors, or spin just about anything else of interest to you.
Required Tools and Parts
Required Tools
- X-acto or other knife for cutting soft plastic
- Coping saw for cutting hard plastic
- Dremel with suitable bit for cutting into hard plastic
- Crazy Glue
- Shoe Goo or some other adhesive for sealing water and air leaks
Required Parts
- 2 CDs
- 1 CD Jewel Case
- 8 neodymium magnets (the strongest ones you can get). For the demo version I used 10 x 5 x 1 mm magnets.
* Optional Parts
Bottle Top for use as a flange
Building the Tesla Turbine
 Step 1: Take 1 CD and glue four magnets to the shiny under side.
All of the magnets should have the polarity going on the same direction. It does not matter if you glue the north or south end to the disk.
Try to make them an equal distance apart so that they balance in terms of weight distribution.
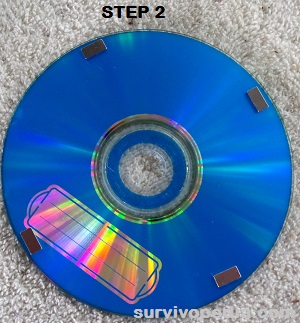
Step 2: Take the second CD and glue the other 4 magnets to the top of it (where the label usually goes). Once again, make sure that the poles of the magnets are all going in the same direction.
This time, however, make sure that the magnets will try to draw to each other when this second disk is between the magnets.
It should be noted that the shiny side of the CDs should face each other, since there is a natural groove between them that makes it easier to draw water or air into them. When building multiple stacks of CDs, you should still put as many shiny sides together as possible.
 Step 3: The magnets should attract to the ones on the other CD and hold the two disks together. For this demo, I did not glue the disks together, however that would be necessary for units that will turn at a higher RPM.
As the disks spin, there is a natural tendency for them to try and move away from each other. This effect can rapidly overcome the capacity of the magnets to stay bound together.
Allow glue on the disks to dry for at least 24 hours before proceeding to Step 11. In the meantime, you can still do steps 4 – 10.
 Step 4: On the lid of the jewel case, draw a box that will be cut away to make an opening port for the turbine.
Next, draw a round space in the center where the exhaust will go through.
It is best to place the exhaust port near the spindle area, since it is closest to where water or air will exit from between the disks.
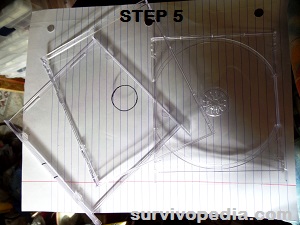 Step 5: Disassemble the jewel case.
You should have three parts: the upper lid where the front jacket goes, the lower lid where back jacket goes, and the third – the central portion that holds the spindle that keeps the CD in place.

Step 6: Look carefully at the central portion. If the spindle does not have holes in it, then you will need to drill to make some. (I used a Memorex jewel case that already had holes in it, so there was no need to modify the central portion.)
Step 7: Use the coping saw to cut out the inflow port.
Then use the Dremel to cut and drill out the exhaust port.
Step 8: Reassemble the jewel case (photo: 5 after cutting).
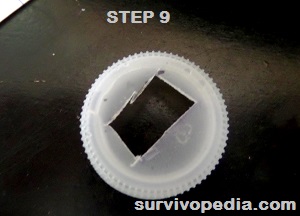
***Optional Step 9:
Take a bottle cap that has a thread size suitable for air or water attachments of interest to you.
Cut the cap in such a way that the opening is the same size as the inflow port.
 ***Optional Step 10:
Glue the bottle cap to the lower section of the CD case in such a way that the hole in the case matches up with the one on the bottle cap. Make sure the threads are facing outward so that you can use them to screw in air or water hoses.
At this stage, make sure that the upper lid of the Jewel case can still be opened and closed.
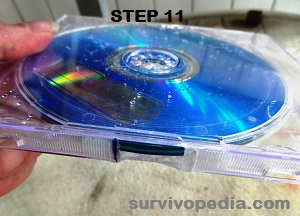
Step 11:
Place CD disks inside the jewel case like normal.
Close the top lid.
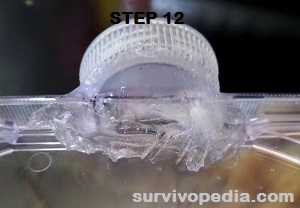 Step 12: Seal the outer edges of the CD to prevent air or water from escaping.
If you added a bottle cap to the inflow port, make sure all areas around it are also sealed off.
Wait another 24 hours for all the glues to dry.
Operating the Tesla Turbine
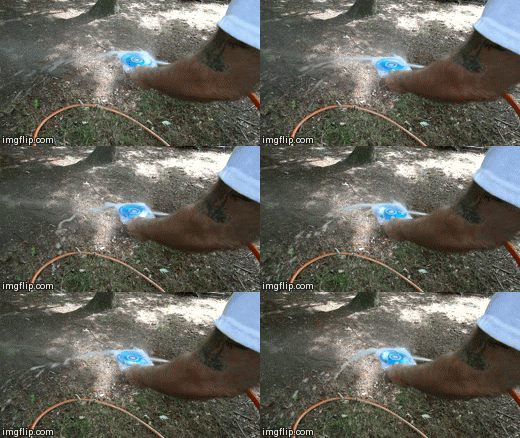 In order to operate the Tesla Turbine, simply attach an air or water hose to the inflow port and let air or water start flowing. You can also use a garden hose (as in the demo video) to see how easy it is to make the CDs spin.
When operating the turbine, you should not be holding it or be anywhere near it; since they are prone to exploding when the RPMs exceed the capacity of the magnets and strength of the disks. The hose in this video was set with enough pressure to make the disks move, plus there was plenty of area for the water to escape.
(Future tests with this unit and ones with more disks stacked up will be done using explosion proof boxes, and no humans or animals will be close enough to get hurt by flying parts.)
Notes for Future Development
The CD version of the Tesla Turbine can be used in endless ways. Individual units can be stacked together to create larger amounts of electricity. They can be connected to windmills, placed under moving water, and coupled with millions of devices that rely on a motor or rotary motion.
Here’s what happens when a Tesla CD turbine meets a generator:
(Video first seen on lolersay.)
The Tesla Turbine is a fairly simple, EMP proof device that can generate power in just about any circumstance. It’s up to you to imagine a use for this turbine.
Learning how to build a working model can help you save on your current energy bills and also help you survive crisis.
This article has been written by Carmella Tyrell for Survivopedia.com.
About Carmela Tyrell
Carmela Tyrrell is committed to off gridding for survival and every day life. She is currently working on combining vertical container gardening with hydroponics. Tyrrell is also exploring ways to integrate magnetic and solar power generation methods. On any given day, her husband and six cats give thanks that she has not yet blown up the house. You can send Carmela a message at carmela.tyrell [at] survivopedia.com.

